The Semrush App Center is a curated collection of apps, which are hand-picked by Semrush. Each one is designed to address a specific marketing need, such as App Store Optimization, Competitive Intelligence, Local SEO, or YouTube optimization. Because these apps are integrated with the Semrush interface, they enable you to save time and simplify your routine.
What Is Included In The Semrush App Center?
Currently, the following apps are offered in the Semrush App Center, created by Semrush and third-party partners:
- AI Social Content Generator
- Audience Intelligence
- Influencer Analytics
- Instant Banner Generator
- Keyword Analytics for YouTube
- Rank Tracker for Youtube
- Social Inbox
- Social Poster
- Social Analytics
- Social Tracker
- EyeOn App
- Accessibility Scan & Monitor
- Ad Assistant
- AdClarity - Advertising Intelligence
- Agency Growth Kit
- AI Social Content Generator
- AI Video Marketing Automator
- AI Writing Assistant
- AI Narratives for GA4
- Audience Intelligence
- Automated Data Connector
- Consumer Surveys App
- EyeOn App
- FindThatLead Domain Searcher
- ImpactHero
- Instant Banner Generator
- Influencer Analytics
- Lead Generation Forms
- Local Listings Check
- Map Rank Tracker
- Mobile App Insights
- Review Management
- Semrush Local
- Semrush Persona
- Semrush .Trends solution
- SERP Gap Analyzer
- TrendFeed
- Video Submission Management
- Website Testing
- Website Visitor ID X-Ray Pixel
- AdClarity - Advertising Intelligence
- Ads Launch Assistant
- AI Narratives for GA4
- AI Video Marketing Automator
- Automated Data Connector
- Brand Monitoring
- ContentShake AI
- Ecommerce Keywords Analytics
- Email Verifier
- FindThatLead Domain Searcher
- ImpactHero
- Instant Banner Generator
- Keyword Analytics for YouTube
- Koala Inspector Online ShopSpy
- Lead Generation Forms
- Local Listings Check
- Map Rank Tracker
- Media Monitoring
- Plagiarism Checker
- Podcast Hosting
- Rank Tracker for Youtube
- Review Management
- Semrush Local
- Semrush Persona
- Shopify Finder
- Social Inbox
- Social Analytics
- Social Tracker
- Video Marketing Platform
- Video Submission Management
- Website Speed Test
- Website Testing
- EyeOn App
How Do I Purchase An App?
Once registered with semrush.com, you can add an app to your collection using the following steps:
- Log into your Semrush account.
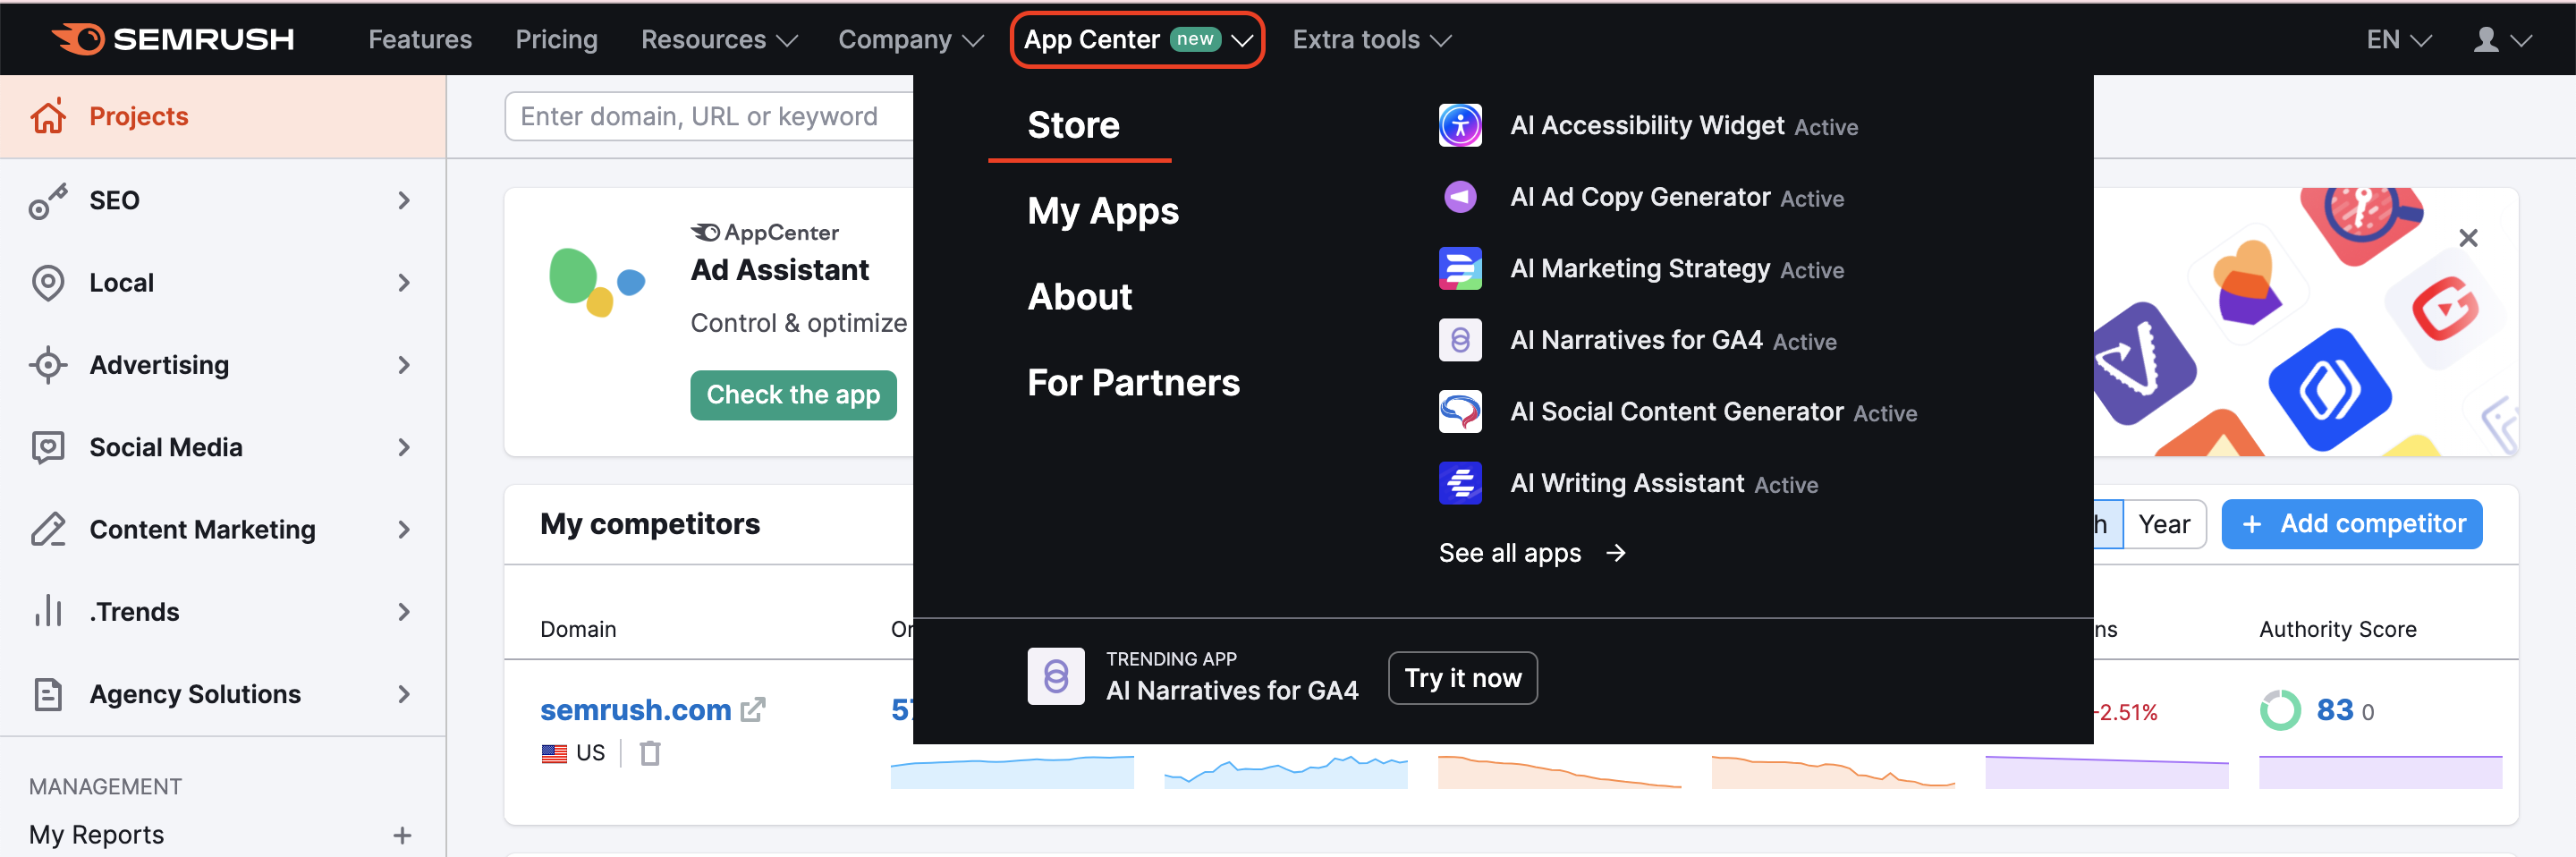
- Open the App Center store using the toolbar in the top menu.
- Choose an app you want to use.
- At the bottom of the landing page of an app you may see the app's description and price.
- Click on the “Get free trial/Get for free” button and follow the on-screen prompts.
- You have just added the app to your collection
How Do I Access My Apps?
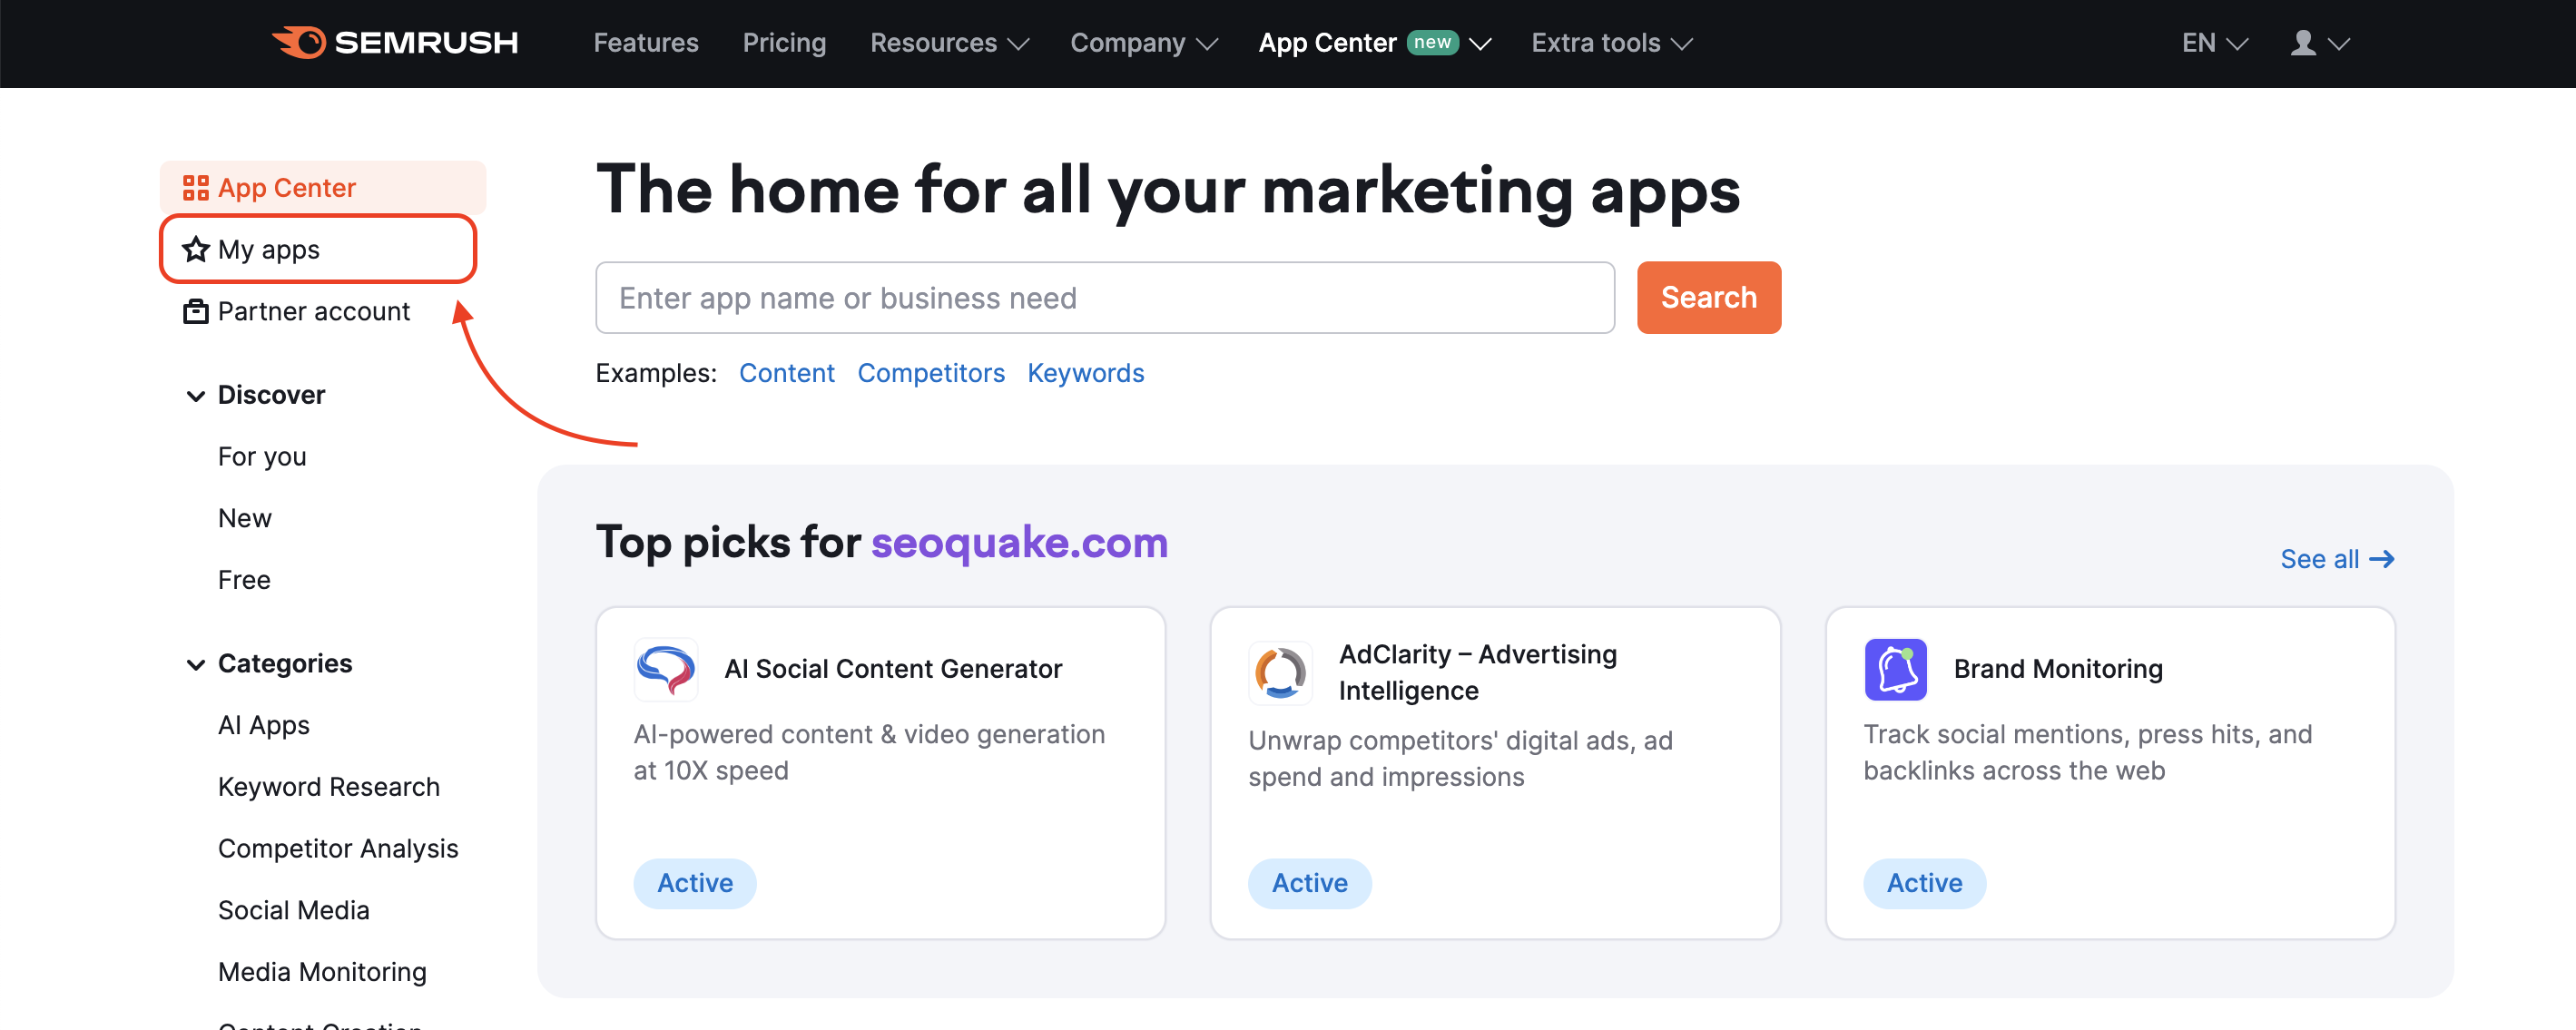
Each app in the App Center can be accessed from your My Apps page:
- Log into your Semrush account.
- Open App Center using the toolbar at the top of the page and click on My Apps.

- Alternatively, you may access your apps from the App Center Store page.
- If you have already purchased an app, the app’s landing page will have a blue button saying “Go to App”.
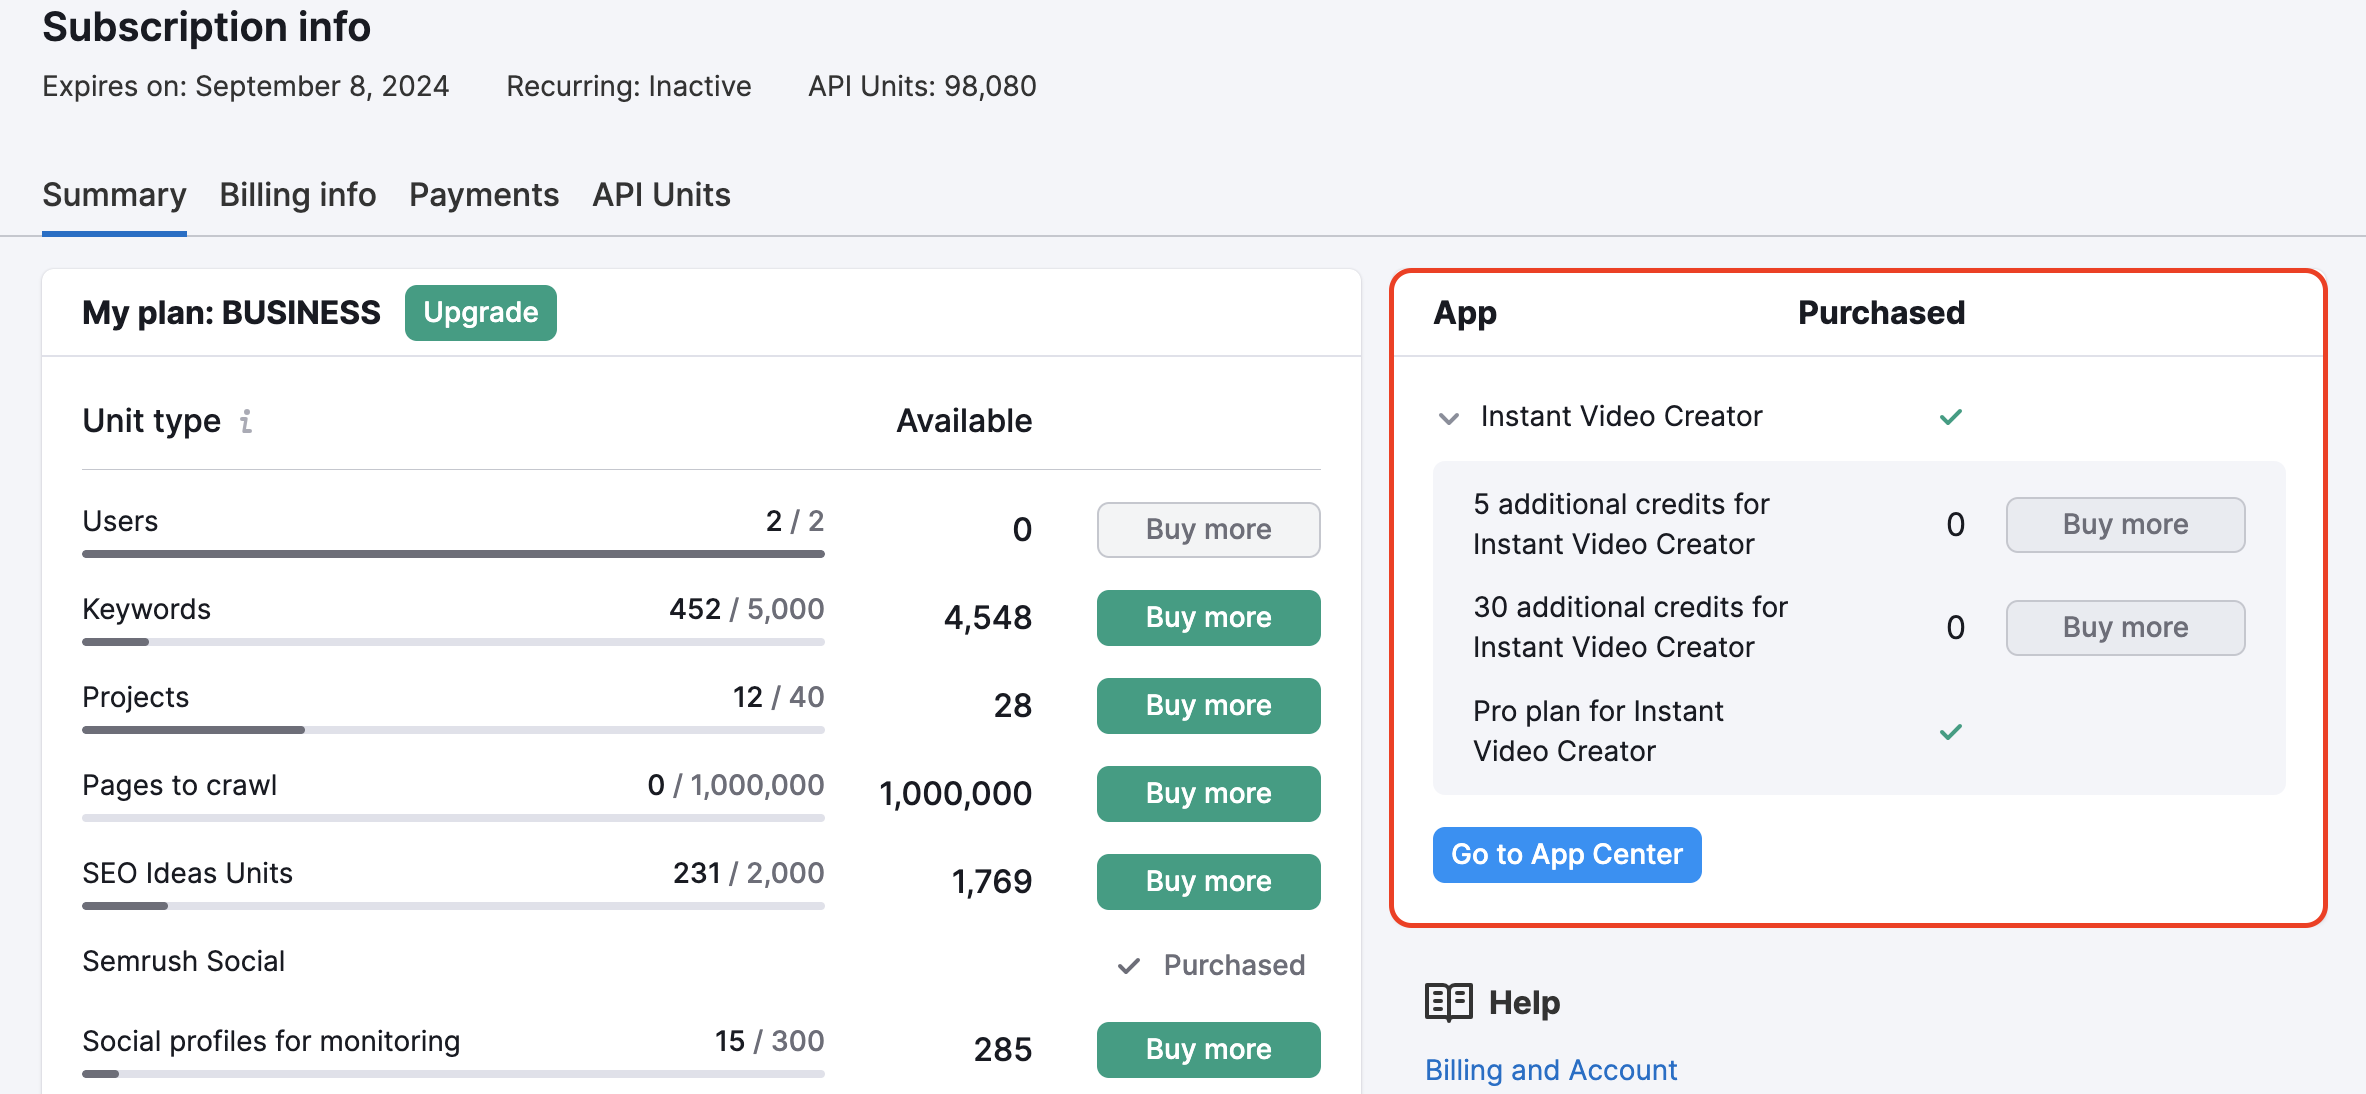
- You can also see all your purchased apps and limits in your Subscription Info.
How Do I Submit An App to the App Center?
If you want to submit your app to the Semrush App Center, please contact app-center@semrush.com and provide the following information:
- Product description
- Target audience
- The problem your app solves
- The most important user cases
Once your request has been reviewed, we will contact you to let you know whether it has been selected.
If you still have questions about the App Center, please email us directly at app-center@semrush.com.